Note: You must have a license for Keyman Engine for Android in order to access the resources documented in this blog. (Purchase a license)
Keyman Engine for Android allows you to use any Keyman touch keyboard in your Android app, or even to create your own system keyboard app for purchase in the Play Store. In this blog, I will walk through the steps for creating your first Android app with Keyman Engine for Android.
If you are not familiar with Android development, you will find the Android Developer online training an invaluable resource, and I recommend you work through some of their tutorials first.
1. Install Tools
- Install Android Studio, which is a free download.
- Install Keyman Developer Beta 9, which is also a free download.
Android Studio runs on several platforms. Keyman Developer 9 runs on Windows 7 or later.
2. Download the Keyman Engine for Android and Sample Project
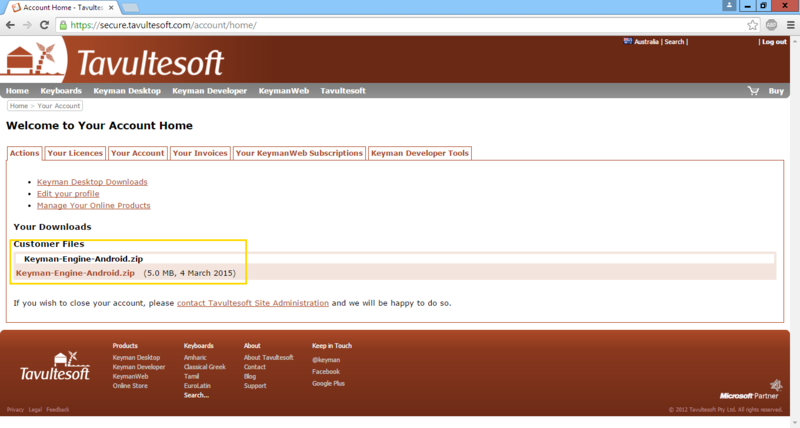
Login to your Tavultesoft Account, and download the Keyman Engine for Android archive.
The archive includes sample projects and an Android .aar library file. In this blog, I will work with the first example project, KMSample1.
- Extract the "KMSample1.zip" file to a new folder.
- In Android Studio, select "File>Open" and choose the KMSample1 project folder that you have extracted in step 1.
- When the project loads, you may be prompted to install Android SDKs; go ahead and follow the prompts to fixup any missing SDK dependencies.
4. Create a keyboard layout
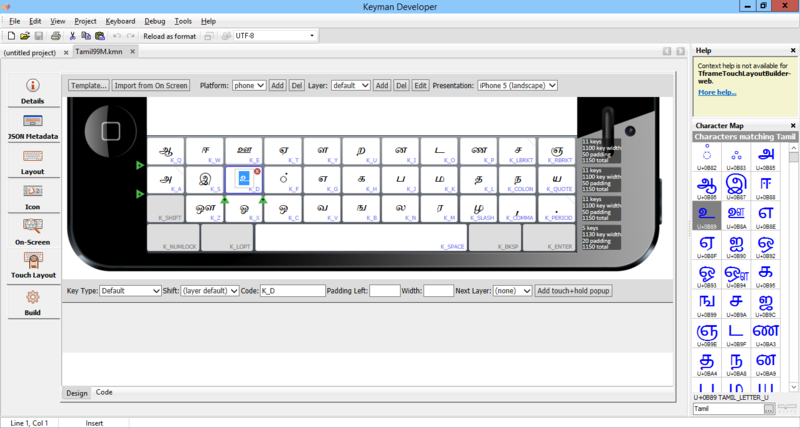
Use Keyman Developer to build a touch layout. The following blog posts walk through some of the development and testing for creating a touch keyboard layout:
- Creating a Touch Keyboard Layout for Amharic with Keyman Developer 9
- Creating A Touch Keyboard Layout For Amharic — The Nitty Gritty
- How to test your keyboard layout with Keyman Developer 9 — touch and desktop
- How to test your touch layout in the Google Chrome mobile emulator
When your keyboard is ready, you should have a compiled keyboard Javascript file. For this example, I am using our Tamil Mobile touch layout.
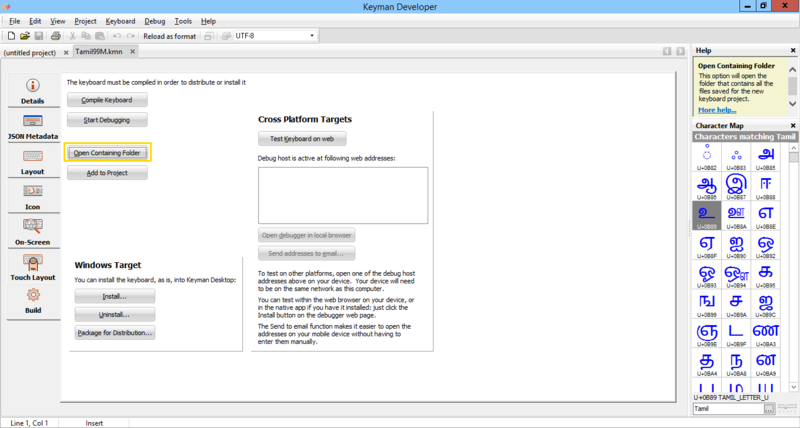
Open the containing folder for the keyboard to find the Javascript file to copy over; its name will be based on your source keyboard name, plus an appended version number.
5. Add your license to the project
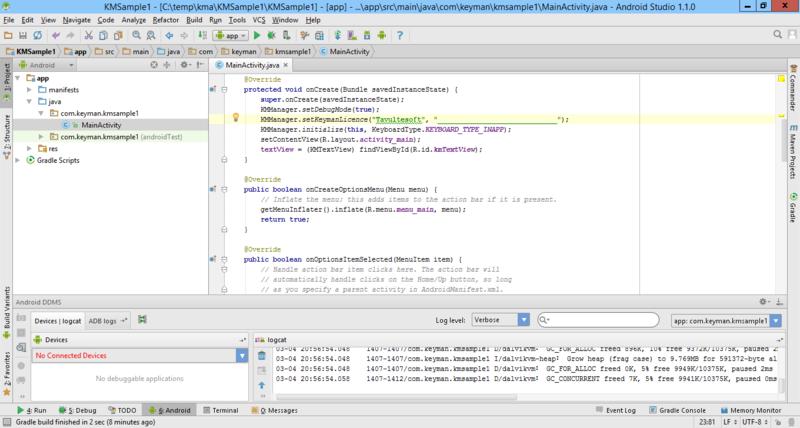
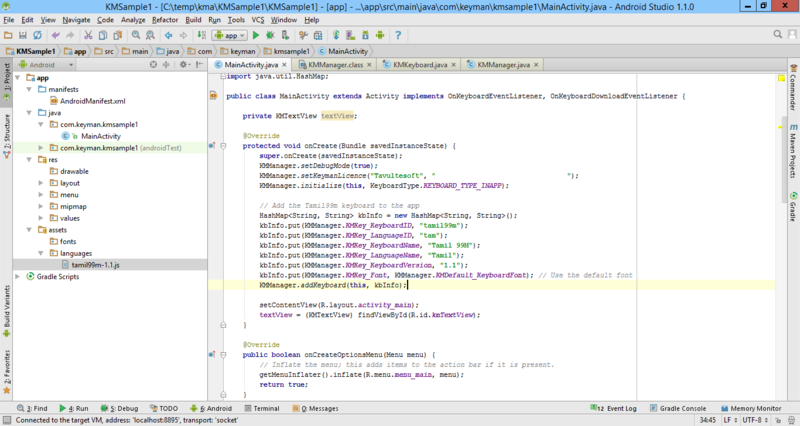
In app>java>com.keyman.kmsample1>MainActivity find KMManager.setKeymanLicence("YourLicense", "YourKey"); and replace "YourLicense" with your license and "YourKey" with your key from Tavultesoft. You will have received this key via email.
KMManager.setKeymanLicence("__________", "_______________");
6. Add your keyboard to the project
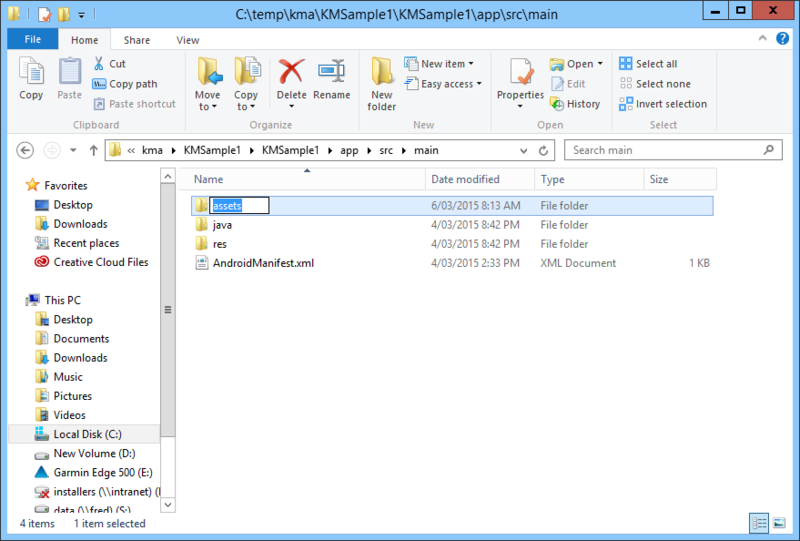
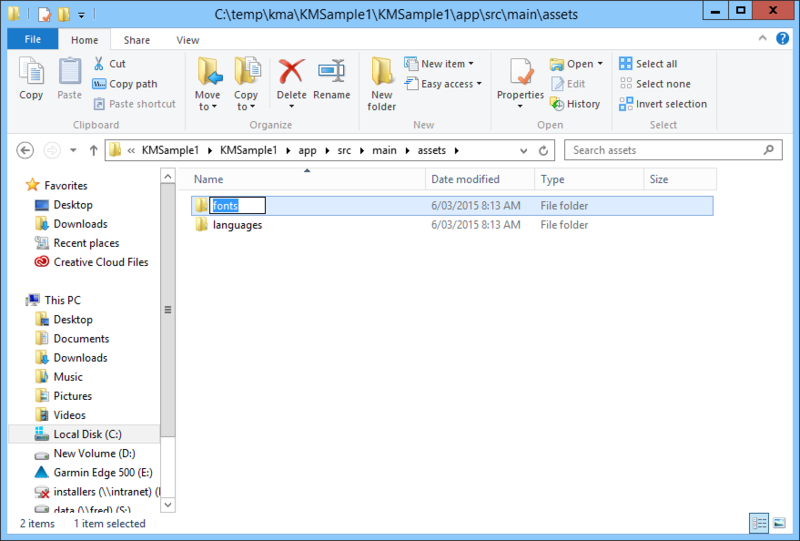
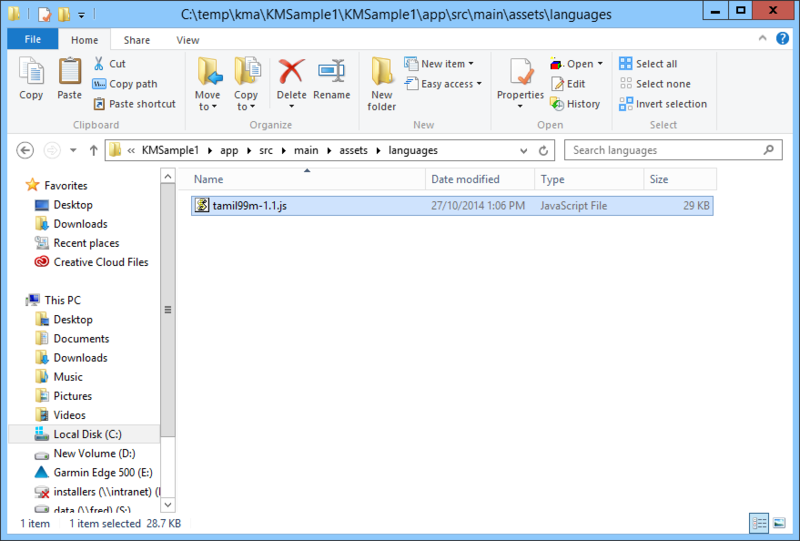
Copy your compiled keyboard file, in my case tamil99m-1.1.js, to the KMSample1KMSample1appsrcmainassetslanguages folder. You will need to create the assetslanguages folders. If you have a font, then copy that to the assetsfonts folder.
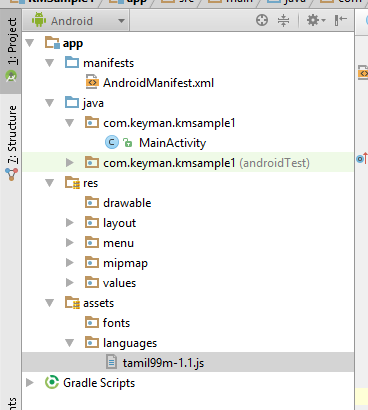
If you've created the folder in the right location, when you switch back into Android Studio, you should see an assets folder appear with your keyboard and font files:
Next, we need to register the keyboard with the KMManager; in MainActivity.onCreate:
// Add the Tamil99m keyboard to the app
HashMap<String, String> kbInfo = new HashMap<String, String>();
kbInfo.put(KMManager.KMKey_KeyboardID, "tamil99m");
kbInfo.put(KMManager.KMKey_LanguageID, "tam");
kbInfo.put(KMManager.KMKey_KeyboardName, "Tamil 99M");
kbInfo.put(KMManager.KMKey_LanguageName, "Tamil");
kbInfo.put(KMManager.KMKey_KeyboardVersion, "1.1");
kbInfo.put(KMManager.KMKey_Font, KMManager.KMDefault_KeyboardFont); // Use the default font
KMManager.addKeyboard(this, kbInfo);
Finally, we need select the keyboard once it has been loaded. Locate the onKeyboardLoaded function, and add one line to it:
@Override
public void onKeyboardLoaded(KeyboardType keyboardType) {
// Handle Keyman keyboard loaded event here if needed
KMManager.setKeyboard("tamil99m","tam");
}
7. Build and run the app
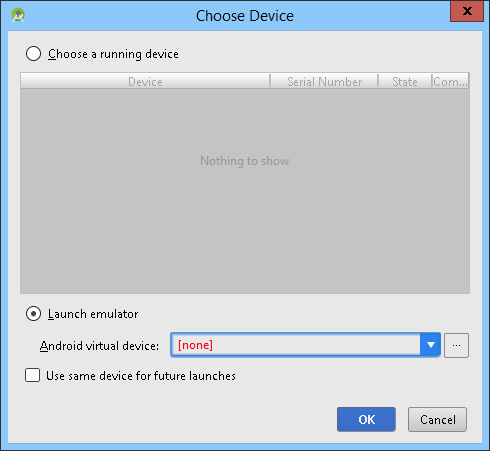
I chose to run this on the Android Emulator. You can run on the Emulator, or connect an Android device via USB to your computer to test. In either case, click the green Run button to start the app.
Click the […] button to add a new virtual device, and follow the prompts. Any recent emulated device should work fine. You will be prompted to download additional resources for the emulator when this runs.
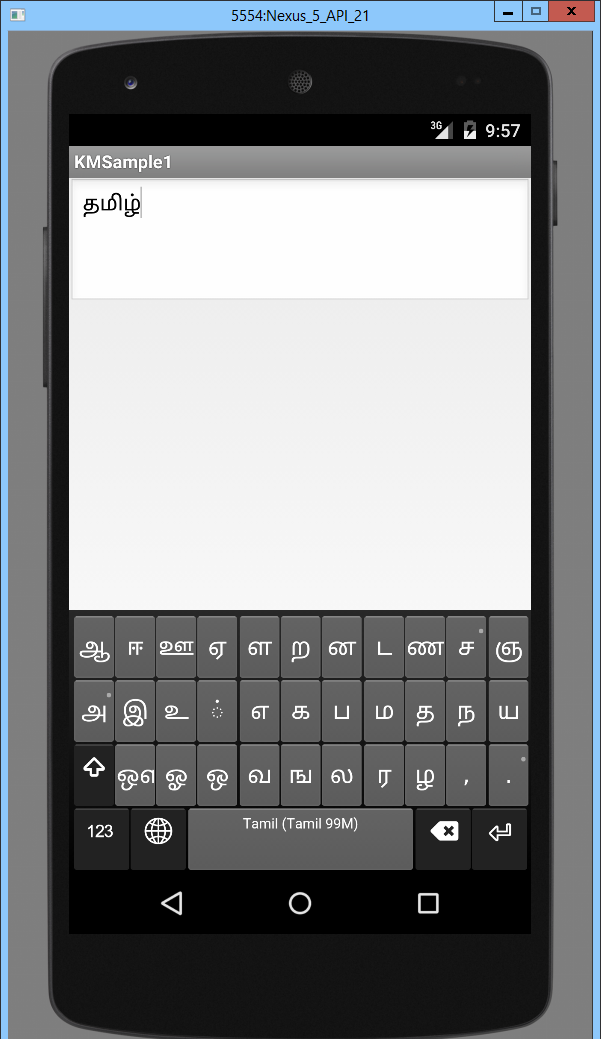
And there you have it: your first Keyman Engine for Android app!
In the next blog in this series we will talk about how to use the Keyman Engine for Android in system keyboard mode, and talk a bit more about the Keyman Engine for Android API.

0 thoughts on “Using Keyman Engine for Android to create a custom keyboard app”